The Topics Manager is organized in a table view, giving users quick access to important information about each topic, including ownership, usage, last update, and status. With this clear and concise layout, your team can efficiently navigate and manage topics, ensuring no important details are overlooked. Introduction messages are now managed in Topics Manager, too.
Setting Up Topics and Categories
Once you log into Let’s Talk, navigate to Settings. Under Account Setup, click on Topics Manager. Here you can customize and organize your Let’s Talk page so Customers can easily find the topic or issue which they intend to submit feedback.
Topics
Topics are areas where you’re seeking feedback. When a Customer submits a Dialogue, they will submit it through the Topic that best describes their needs. Topics may be specific departments such as “Transportation” or “Human Resources,” schools, or other topics.
Categories
Categories are the sections for organizing Topics on your Let’s Talk page. Examples of Categories are Elementary Schools, Central Office Departments, and Special Topics.
Adding Categories
- Under Settings > Account Setup, click on Topics Manager.
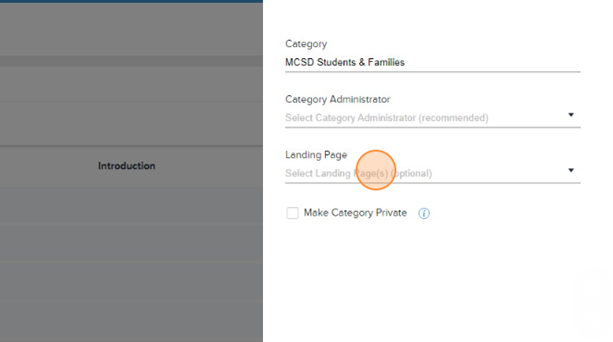
- To add Categories, click the blue button labeled Add Category. Type the name of the Category you would like to add (e.g., Central Office, High Schools, State Policies, etc.), and choose if you’d like to assign a Category Admin or landing page, then hit Save.
- Once a Category Owner is assigned, you can also make the Category private by checking the Make Category Private box. Topics in Private Categories cannot be accessed by anyone other than the Category Owner and the respective Topic Owners. To edit an existing Category, check the box to the left of its name and click Edit Category.
- To view Topics within a category, click on the Category name to expand it.
Option 1 for Adding Topics: Topics Manager
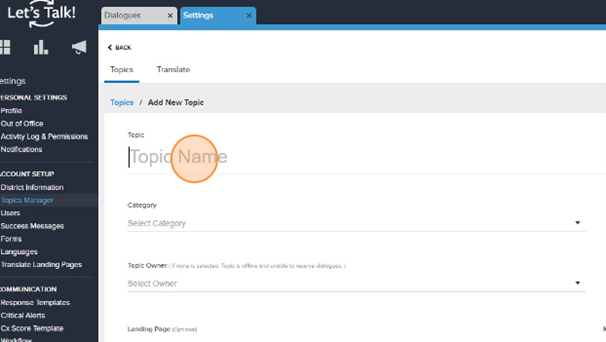
- Under Settings > Account Setup, click on Topics Manager.
- Click on the blue Add Topic button.
- Next, assign a name, category, owner and team members, success messages, and decide if you’d like to make the Topic private.
Pro tip: Taking a minute to add an optional introduction for your topic will save you time in the long run. Add a welcoming introduction message, and use this space to provide guidance related to frequently requested information and resources.
Click Save & Close, or Save & Add Another if you have a list of topics to add at once.
Option 2 for Adding Topics: Landing Page/Tab Editor
- Under Settings>Form Setup, click on Landing Page/Tab Editor
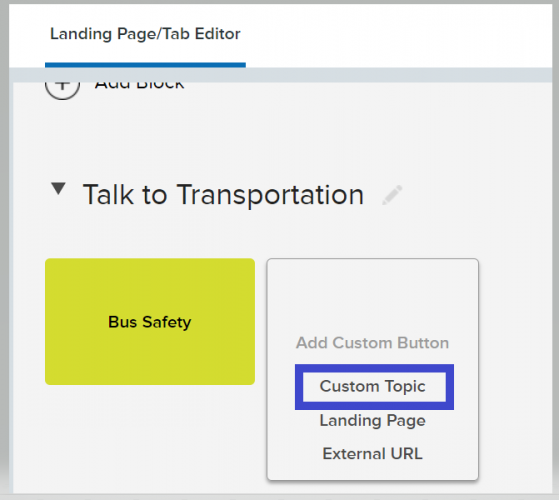
- From your landing page, add categories underneath the Content tab, or click on “Add New Section” to create a Category.
- Now that you have a category, you will be able to create custom topics by clicking on “Add Custom Button>Custom Topic.”
- From here you can create your Topic name, and assign an owner and team members. Once you click “add,” it will be live on this Landing Page.
- Remember to hit save at the top right-hand corner to save your changes!
Editing Topics and Categories
For System Administrators:
Navigate to the Topics Manager and select or search for the Topic you want to edit. Click on the topic name to open the editor.
Pro tip: Hover over a topic name to view stats like Number of Dialogues Received and Last Dialogue Received.
Archive: Check the box to the left of the Topic(s) you wish to archive and click the Bulk Options dropdown. Select Change Status, then Archived, then Save.
Edit: To edit a Category’s name, Admin, or Landing Page, check the box to the left of the Category name, then click Edit Category. To edit a Topic, click the Topic name to edit the name, team structure, landing page(s), success messages, and introduction, and decide if you’d like to make the Topic private.
Delete: Check the box to the left of the Topic(s) you’d like to delete, then select Bulk Options. Click Delete Category/Topic.
Note: A Category cannot be archived if it contains assigned Topics. You must first remove the assigned Topics before you archiving the Category.
Re-Order: Categories can be re-ordered by simply dragging them within the Topics Manager. To move a Topic to another category, check the box to the left of the Topic name and click Bulk Options. Select Move to a Category. Select the new Category, and click Save.
Bulk Edit Topics
Check the box to the left of two or more topics, then click Bulk Options. Make convenient updates to topic ownership, team members, landing pages, and success message groups in one go, saving time and simplifying the management process for large-scale changes.
Translate Topics
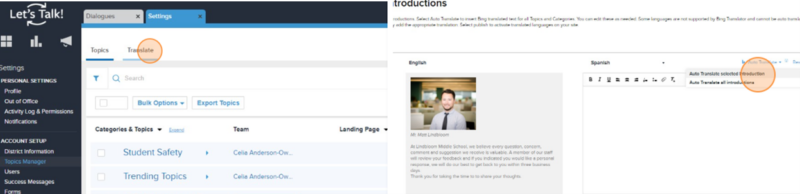
The translate feature is now integrated within Topics Manager, which makes it easier to manage content in multiple languages. All translation interfaces now offer auto-translation capabilities, allowing users to translate content with the click of a button.
Within the Topics Manager, toggle from Topics to Translate. Within the Topics tab, select a language from the dropdown, then add your translation manually or use the Auto-Translation feature. Save as a Draft or Publish your updates with one click.
Orphaned Topics
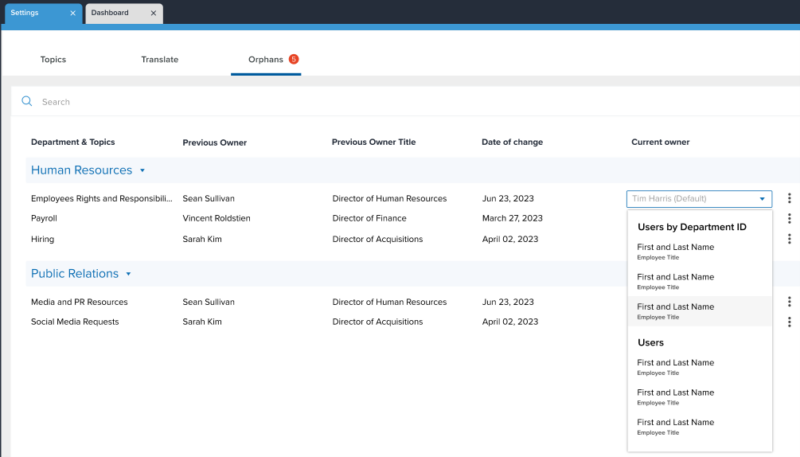
Any topic whose owner becomes inactive will automatically transition into an Orphaned Topic. Located in the Orphans tab, these topics are organized by Department. Detailed information including the previous topic owner’s Name, Title, and Date of the change helps to determine who the next owner should be, controlled within the Current Owner column.
Topics can also be archived directly from the Orphans page, in cases where they are not needed anymore. A Search bar makes it easier to quickly locate and access topics.
For Topic Owners
As a Topic Owner, you have the ability to edit your Topic’s Team Members. This option is available under your Settings by clicking on Users.
From the Users page, you’ll see a complete list of those who currently have access to the Topics you own. Remember, System Administrators and Global Users have access to all Topics, so they are automatically included on the list.
To edit a user, click on their name or check the box next to their name and click Edit User. To add new users, click Add New Users.