Skip to content
site logo
  • Home
  • Articles
    • How-to Articles
    • Product Updates
    • District Examples
    • Getting Started
    • Best Practices
    • FAQs
  • Resources
  • Training
    • New User
    • Tips and Tricks
    • System Admin
  • Support
  • Home
  • Articles
    • How-to Articles
    • Product Updates
    • District Examples
    • Getting Started
    • Best Practices
    • FAQs
  • Resources
  • Training
    • New User
    • Tips and Tricks
    • System Admin
  • Support
Let’s Talk Login

Live Agent Settings

  • Category: How-to Articles
  • Tags: Account Setup, Let's Talk

More results...

Generic selectors
Exact matches only
Search in title
Search in content
Post Type Selectors
Articles

Home - How-to Articles - Live Agent Settings

Take your customer service to the next level by enabling the Live Agent option. If your Let's Talk! Assistant is unable to answer a customer's question, the customer can choose to chat in real-time with an available member of your team. Start building your live agent team now! 

Adding Live Agents

System Administrators can assign users as Live Agents. Once assigned, these users will be able to accept chat requests when they designate themselves as available within the inbox of their Let's Talk! account. 

  1. Go to Settings, and select “Live Agent” under the Channels section in the left panel. 
  2. This will bring you to the Live Agent setting page where you can add or remove existing agents.
  3. Ensure that the “Enable Live Chat” switch is toggled to ON.
  4. To add a new Live Agent, simply click on the “Edit Team Members” icon next to the Live Agents heading, and type the name of the desired user in the pop-up window.
  5. Click “Save” to confirm your changes.

Quick Replies


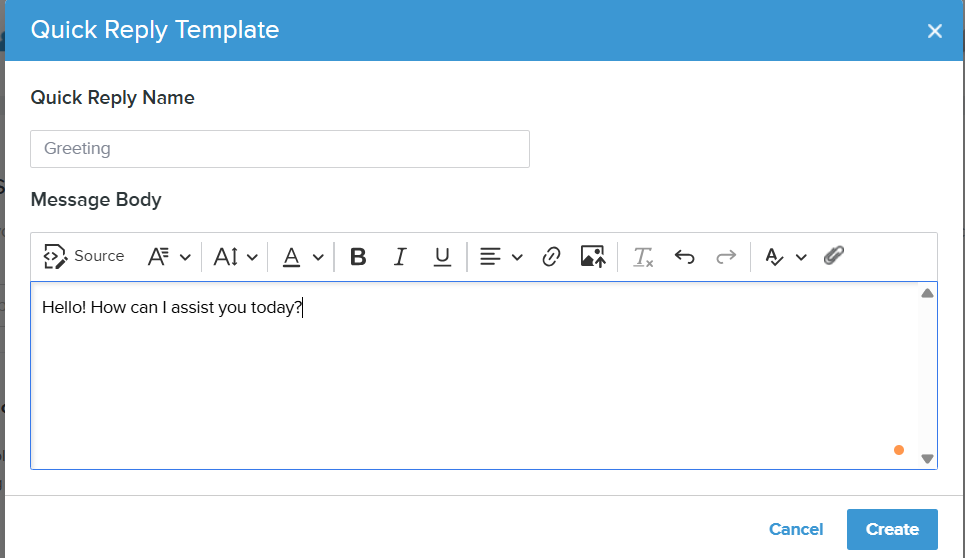
Quick Replies are templates for your Live Agents to use while chatting with customers. Taking a moment to create these replies will help your agents provide quick and accurate service in every interaction.

  1. Go to Settings, and select “Live Agent” under the Channels section in the left panel. 
  2. On the Live Agent settings page, scroll down to the Quick Replies section.
  3. Click the “Add Quick Reply” button to launch the pop-up window
  4. Create a name for your new Quick Reply. This title should convey the overall sentiment of the Quick Reply so that members of your team can easily identify when to use it.
  5. In the Message Body text box, type the actual content of your Quick Reply that you want sent to customers.
  6. Click “Save” to confirm your changes.

Note: This feature is only available if you are currently using our chatbot - the Let’s Talk! Assistant. Interested in enabling these functionalities? Contact your K12 Insight Customer Success Manager or click “Need Help?” in the lower right corner and fill out the form. 

Was this article helpful?

PreviousHow to Customize Your Let's Talk Inbox
NextOptimization for Let's Talk Assistant

Related Post

How to Set Up Let's Talk! Assistant in Other Languages

Offer the convenience of Let’s Talk Assistant to more of your community by enabling Spanish in Settings > Let’s Talk Assistant. Once enabled by a System Administrator, customers will have the option to interact with multiple language options available in

Read More ➜

Resource Management: Streamlining Your Content

Welcome to the Let's Talk Resource Center, where efficiency meets organization! In this article, we'll explore what the Resource Center is and how you can effectively utilize it to manage various types of resources to enhance the interactions with your

Read More ➜

How To Set Up Translations

If multiple languages are used in your community and in your normal district communications, you will want your Let’s Talk account to reflect this diversity. Make it easy for everyone in your community to ask questions and share feedback with

Read More ➜
site logo

Need support?

Our Client Services Team is here to help between 8:30 a.m. – 8 p.m. ET. Get support here or call us at (703) 542-9601.

Follow Us on

Youtube Linkedin

Get Let’s Talk on Mobile

apple store
g play

Quick links

  • Privacy
  • Security
  • Support
  • Training
  • Resources
  • Credits

Articles

  • How-to Articles
  • Product Updates
  • District Examples
  • Best Practices
  • Get Started
  • FAQs

Get Newsletter

Sign up to get Let’s Talk Tips & Tricks delivered directly to your inbox.
Scroll to top