Onflo (formerly Let's Talk!) can make contacting a client easier through its user-friendly interface. This article will demonstrate how to manage inbound calls and identify features of the Let's Talk phone system including muting a client, putting a client on hold, transferring calls and additional features to provide a superior customer experience.
Status
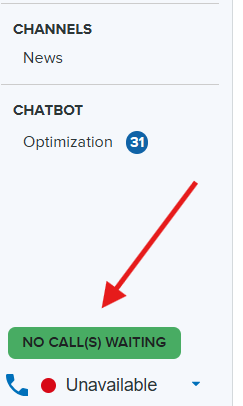
Status - Allows incoming calls to be received by agents. This feature is located at the bottom left hand corner of your side panel.
Status Options:
Unavailable: Agent cannot take calls
Available: Agent can take calls
When you log into Onflo you will be defaulted to the Unavailable status. You can change the status to Available to begin taking calls when you are ready by clicking on the status bar.
Available Calls
When agents are handling calls they can view how many calls are waiting in their queue. This feature can help prioritize and manage their workload more effectively.
Receiving Incoming Calls
When receiving an incoming call from a customer Onflo will display a pop-up with caller ID information along with any additional relevant data, before the agent picks up the call.
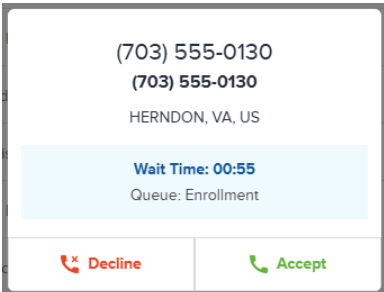
If the agent accepts the call, they are immediately connected to the caller and shown the call panel.
Handling Callbacks
If your queue has enabled callbacks, then some callers may opt to hold their place in the queue and request a callback instead of waiting. In this case, callers will receive a slightly different popup.
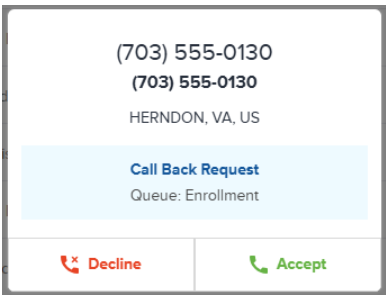
If the agent accepts a callback, they initiate making an outbound call to the customer. If the customer picks up, it proceeds from there as a normal call. If the customer doesn’t, the agent may leave a voicemail.
Using the Call Panel
When handling a call you can either have your call window in full display, or in a compact view as a side panel to the right hand side of your screen. Once compacted, the call side panel can be moved around.
Compact View
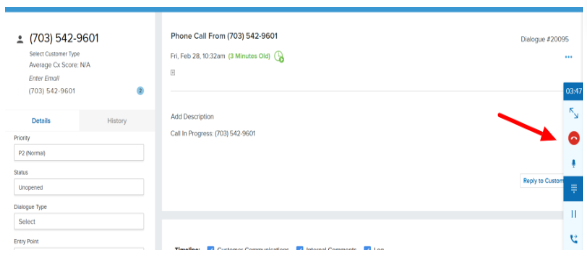
Full Window
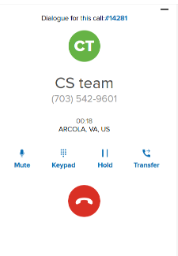
Once compacted, the call side panel can be moved around. To move your panel press and hold your mouse on the grid at the top and move to an area of your screen that is most convenient for you.
To expand back to full view: If you wish to expand the window back to full view you can click on the double arrow icon to expand the window back to full view. In addition this panel can also be moved around your screen to ensure it is not obstructing your screen. To move the panel click on the panel and hold your cursor and drag the panel to the best position for you on your screen.

Documenting a Call
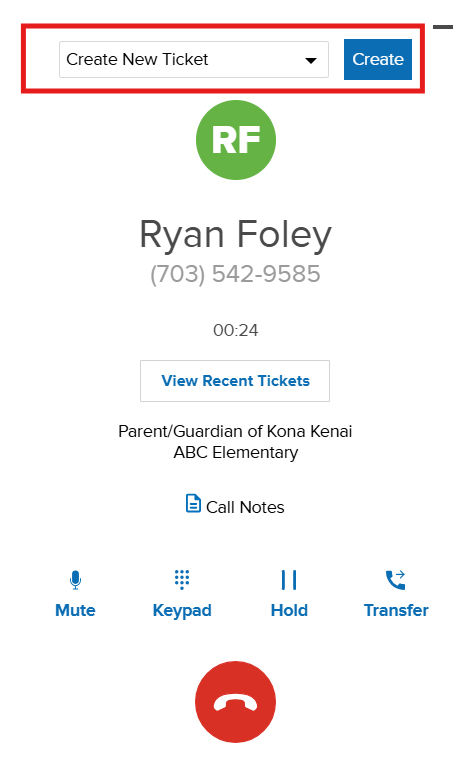
Once you have accepted a call you will have the capability to create a ticket so you can document the call. Depending on settings set by your System Administrator, you may have the following options available to you:
- Create a New Ticket
- Add to Existing Ticket
- No Ticket
To generate the ticket select Create New Ticket from drop down menu, then click Create.
To Add to an Existing Ticket select the option from the dropdown menu, then select the existing ticket from the sub-dropdown menu you wish to add it too. Click Add, and this will add the call to the existing ticket. 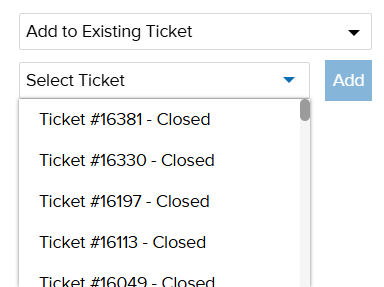
If you do not wish to have a ticket generated for the phone call you can select No Ticket from the dropdown menu, and the call will not have a ticket associated with it

Once the call is concluded, no ticket will be created to associate the call with.
Call Notes
Call Notes allow you to provide context and essential information from the call into your ticket. Agents can add their own notes, or use call note templates during a call without opening the ticket page. If you are a System Administrator, and would like to learn more about creating templates, please review our article Outbound Calling: Initiating Calls and Understanding Caller ID and Pickup Rates
Access Call Notes
To access this feature click on the Call Notes button within the call, then fill in the notes in the Call Note field
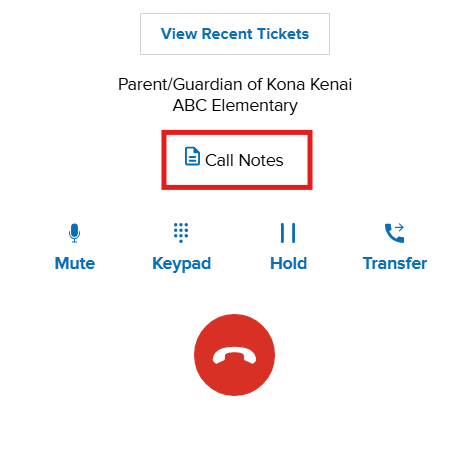
You can also access this feature with the call panel minimized during the phone call

Adding Notes
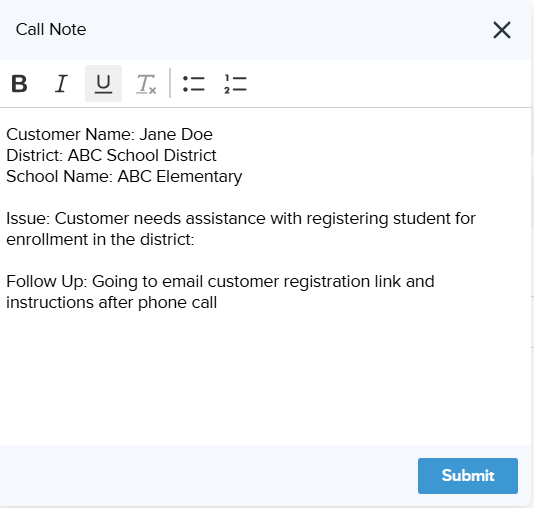
Once you have accessed the feature you can document any applicable notes related to the call in the field. You also have the capability to format the notes using the formatting tools available. Notes are automatically added as Internal Comments in the ticket.

Additional Features
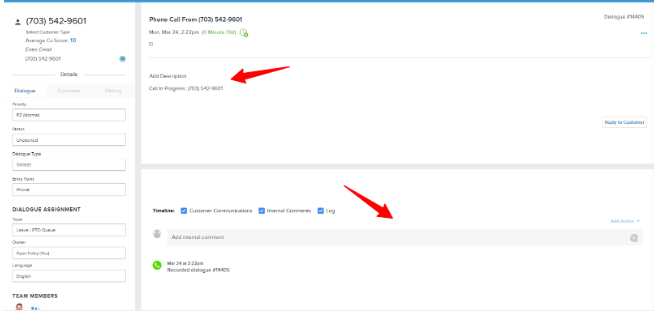
- Add a Description:This provides a field for notes pertaining to the call.
- Create Internal Comment: This field provides an area to take notes and tag internal staff members who you may need to have a view of the ticket.
Once you have completed the call you can reply to the customer in the ticket if needed. Please consult with your district regarding documentation policies and procedures within Let’s Talk for phone interactions.
Call Tools Available in Keypad
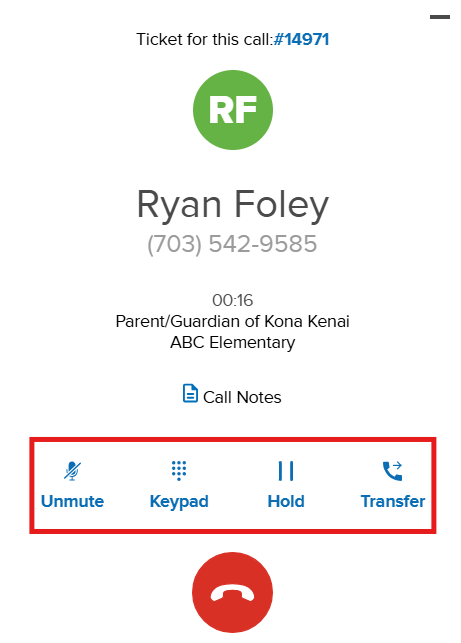
Now that you have learned about accepting and documenting a phone call we are going to explore different tools available within your Onflo Keypad including the following:
- Contact Book
- Mute
- Hold
- Keypad
- Transfer
Contact Book
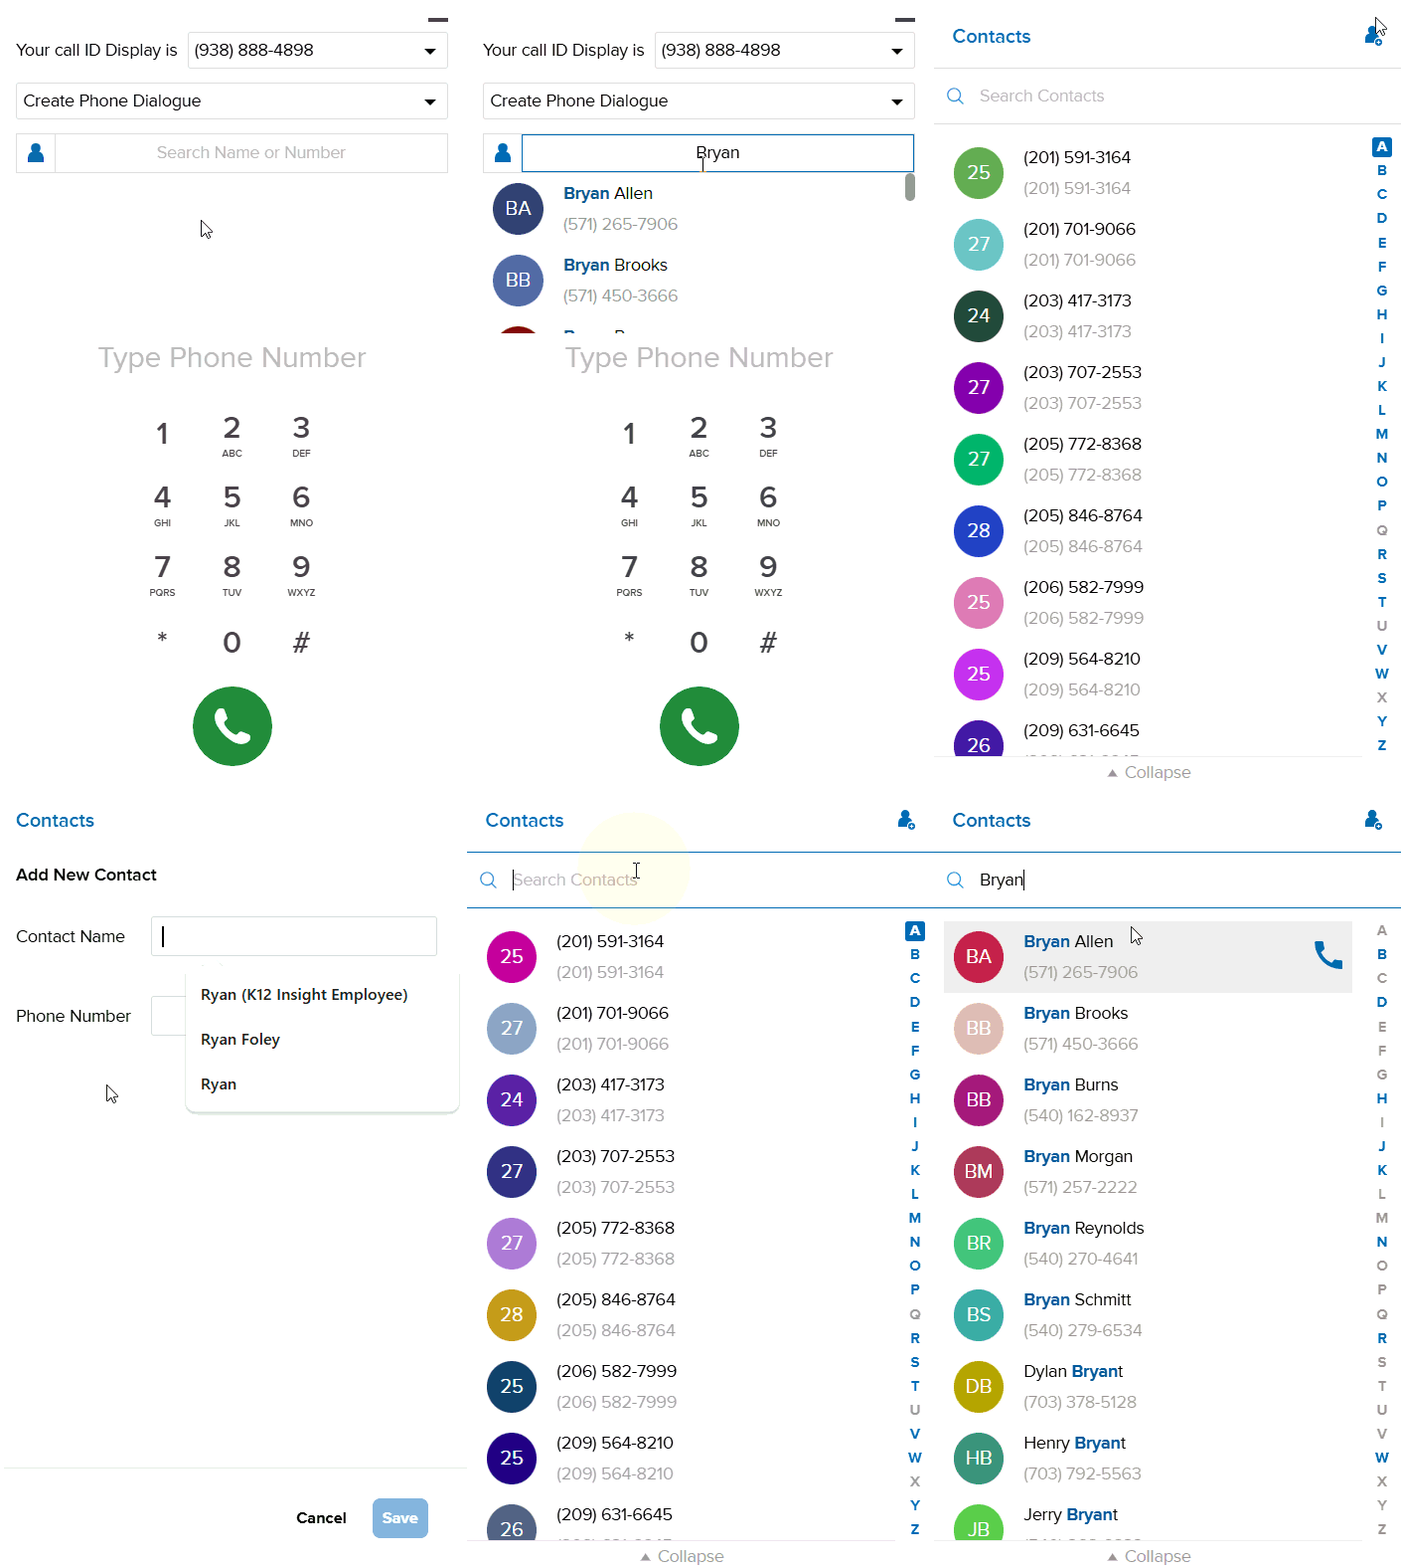
Agents have quick access to Search for, Create, and Manage contacts in the Contact Book feature located within the call panel. Within this feature users can do the following:
- Search Contacts (prior calls)
- Create Contacts
- Call Contacts
Mute Versus Hold
Mute: The mute feature temporarily disables the microphone, preventing the other party on the call from hearing the agent's side of the conversation, while still allowing the agent to listen to the caller.
Hold: The hold feature places the caller on a waiting line, typically with hold music or a recorded message, while the agent attends to other tasks or conversations.
Transferring Calls
Call transfers allow you to redirect a call from one agent to another, or to another queue either within the same category or to a different topic team, to ensure the customer receives the appropriate support.
Types of Call Transfers: Within the Transfer option you have two main choices: Direct Transfer or Ask First. The difference between these two types of transfers is essentially whether or not you are introducing the caller/issue before you hand it off. For more clear guidance on how calls should be transferred, please consult with your district.
From your perspective in Onflo, this is how you would perform each type of transfer, both using an Agent/Topic Name, or a Phone Number.
Direct Transfer: By Agent Name
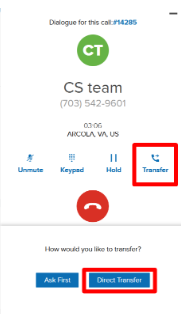
- Click Transfer, then select Direct Transfer.
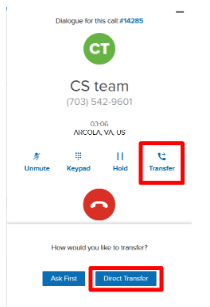
- Type in the name of the agent on the dial pad.
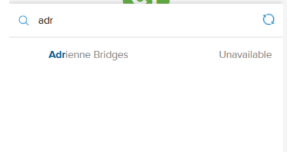
- Hover your cursor over the agent’s name.
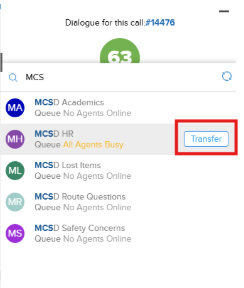
- Click the Transfer button next to the agent’s name.
Note: The originating agent drops off the call as soon as the transfer is initiated.
- Agent to External Number: The agent can transfer a phone call to any other number.
Direct Transfer: By Number
- Type in the number on the dial pad
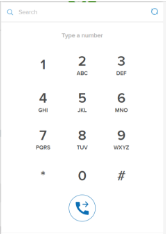
- Click the blue place call icon to transfer the call.
- Click Okay.
Direct Transfer: Transfer to Queue
- Click Transfer, then select Direct Transfer
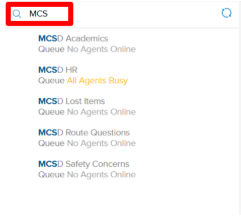
- Type in the topic name in the Search bar of the dial pad.
- Click the blue place call icon to transfer the call.
- Click Transfer.
Ask First Transfer
This transfer type allows the agent to conference with the person they are transferring the call to prior to patching the customer through.
- Select Transfer, then select Ask First.
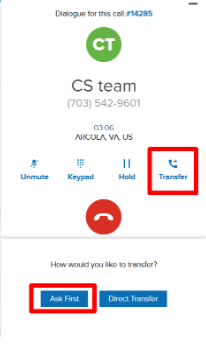
- Enter the phone number to transfer to (use dialpad or search) and click on the blue place call icon.
- When transfer recipient picks up, share necessary information.
Note: If the recipient is unable to take the customer call, click the red phone icon next to their number hang up to resume your call with the customer.
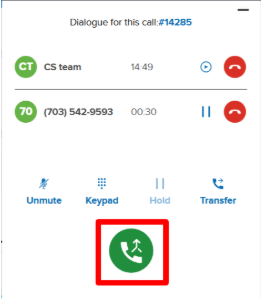
- To merge calls, click on green merge call icon.
Wrap Up Time
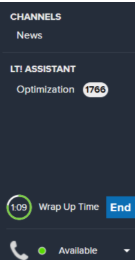
Once you have concluded your call and hung up, Onflo will automatically enter you into Wrap Up Time to complete follow-up tasks, such as documenting the call, updating customer records, or scheduling further actions.This time allows you to do this before you become available to take another call.
How It Works
Your countdown immediately starts after the call is ended and is a countdown located in the bottom left hand corner of your Onflo side panel in your Inbox. Once the countdown has ended you will become available to receive another call from the queue.
Early Wrap Up
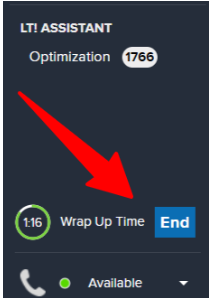
Wrapped up your call before the timer is up and ready to take another call? Simply click End and the time will be removed and you will be available to take another call.
Landline vs. Mobile
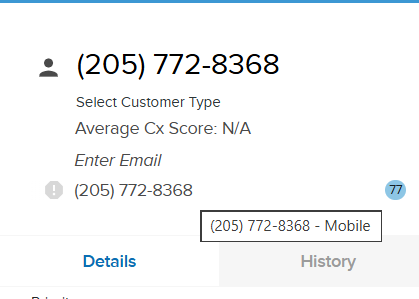
Our customer tickets can identify whether a customer is calling from a landline or mobile phone. Knowing what type of phone can allow your organization to better determine whether the customer can be replied to via text message saving time and providing a more efficient workflow. To determine whether a phone call originated from a landline or a mobile phone you can hover your cursor over the phone number in the ticket. This will provide an indication of the origin type for the phone call.
