Let’s Talk’s Call Center feature provides many exciting upgrades to our Basic Telephony service. This article will review Call Center’s features including the following:
- IVR Routing
- Business Hours
- Holiday Calendars
- Advanced Queue Settings
- Repeating Queue Greeting
- In-Queue Voicemails
- In Queue Callback
IVR Routing
Interactive Voice Response (IVR) is a call routing system that allows callers to interact with a menu using their phone's keypad. Our Call Center feature allows you to configure IVR menus to route users to the right queue or voice memos.
IVR Settings in Let's Talk
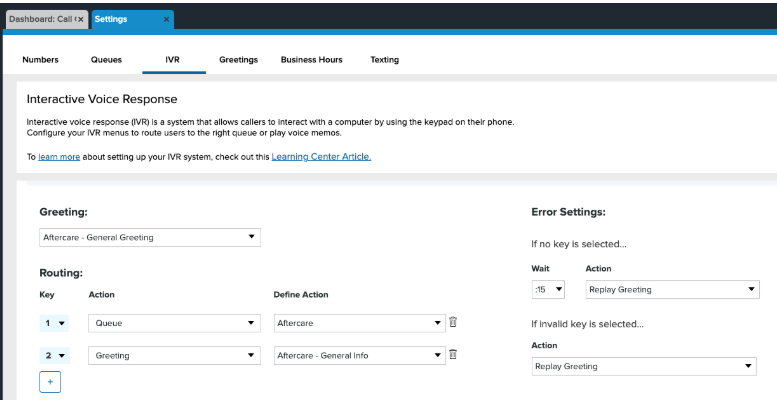
Users can create multiple IVR Menus on the IVR settings page. Within each IVR Menu, you can configure a greeting message or routing instructions to be heard when customers call in.
Setting IVR Name
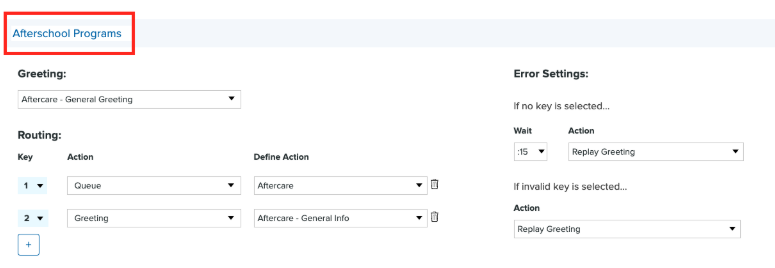
Choose a name for the IVR, which will display in the collapsed view, and select the IVR as a routing option.
Select a Greeting
Select a greeting to play as the greeting message for an IVR. For instructions on creating greetings, click Overview of Telephony and Call Center, then scroll down to "Greeting Settings".
Call Routing
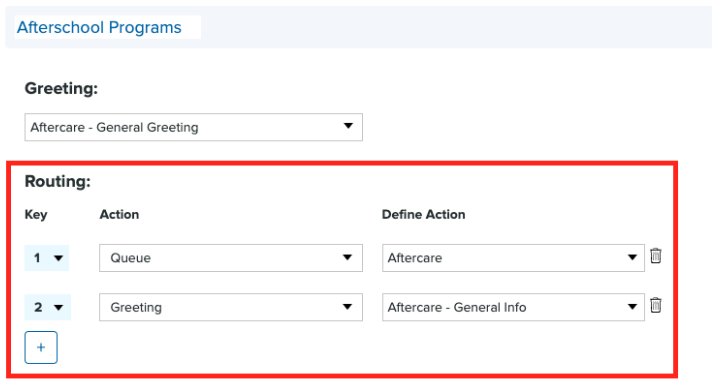
Users can choose how key selections will route to specific actions from the following options:
- Queue: Choose a queue to route calls to a specific group or department.
- IVR: Choose an IVR to route calls to a multi-layered menu and present more menu options.
- Greeting: Select a Greeting recording to play a simple message before ending the call.
Error Settings
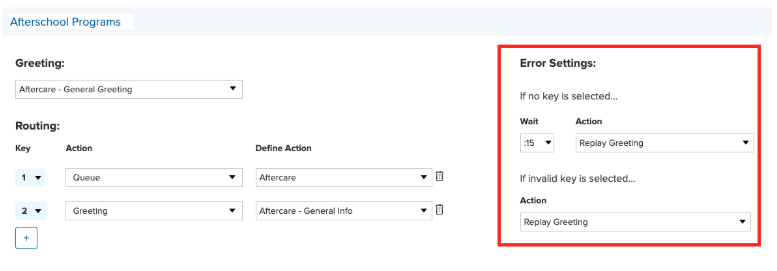
Users can decide what happens if no key is selected after a customizable amount of time:
- End Call
- Replay Greeting
- Greeting: Select another audio recording to play.
Users can also decide what happens if an invalid key (any key that is not configured) is selected:
- Replay Greeting
- Recording: Select which recording to play.
Business Hours
Create business hour rules to indicate which phone queues are open and available to take calls during specific days and times of the week. Calls received outside of business hours will go to voicemail.
Add Business Hours
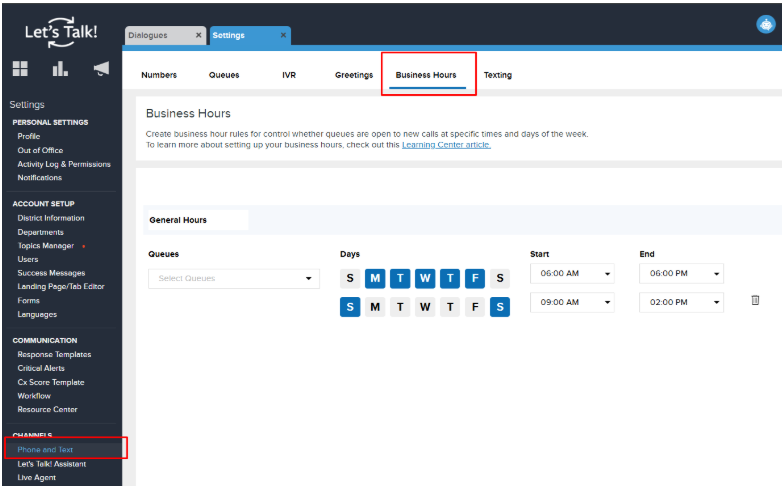
- Within Settings, click on Phone and Text under the Channels section; then select the Business Hours tab.
- Click the Add Business Hours button.
- Name your entry and choose which queues, days, and times these business hours will be in effect.
- You can set up to 7 configurations for each day within the same queue. (Ex: The Transportation queue is open 8 am - 5 pm on M, T, W and 9 am - 3 pm on Th and F.)
- Save down below to start using these business hours.
Remove Business Hours
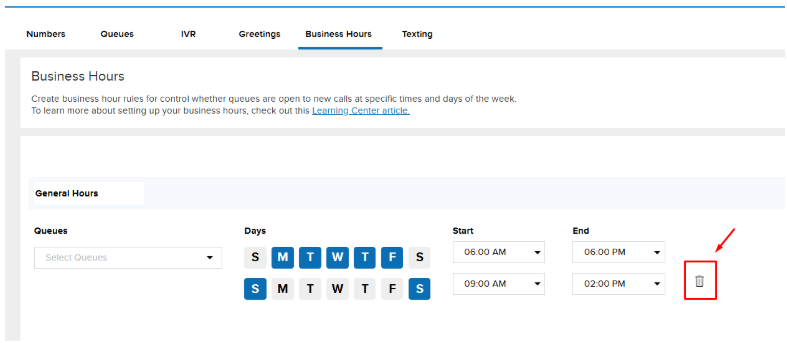
You can delete a Business Hour entry by simply clicking the trash can icon next to it. Don't forget to click on Save down below!
Holiday Calendar
Create holiday calendars to create special business hours for specific dates and play unique voicemail greetings.
- Within Settings, click on Phone and Text under the Channels section; then select the Calendar tab.
- Click the Add Calendar button
- Name your calendar and choose which queues which should use it.
- Create holidays by selecting date ranges and creating rules
- Add a holiday name
- Add a start and end date for the holiday
- Choose whether the holiday has business hours or is closed
- Choose a voicemail greeting (defaulted to the queue voicemail greeting)
- Save down below to start using this holiday calendar.
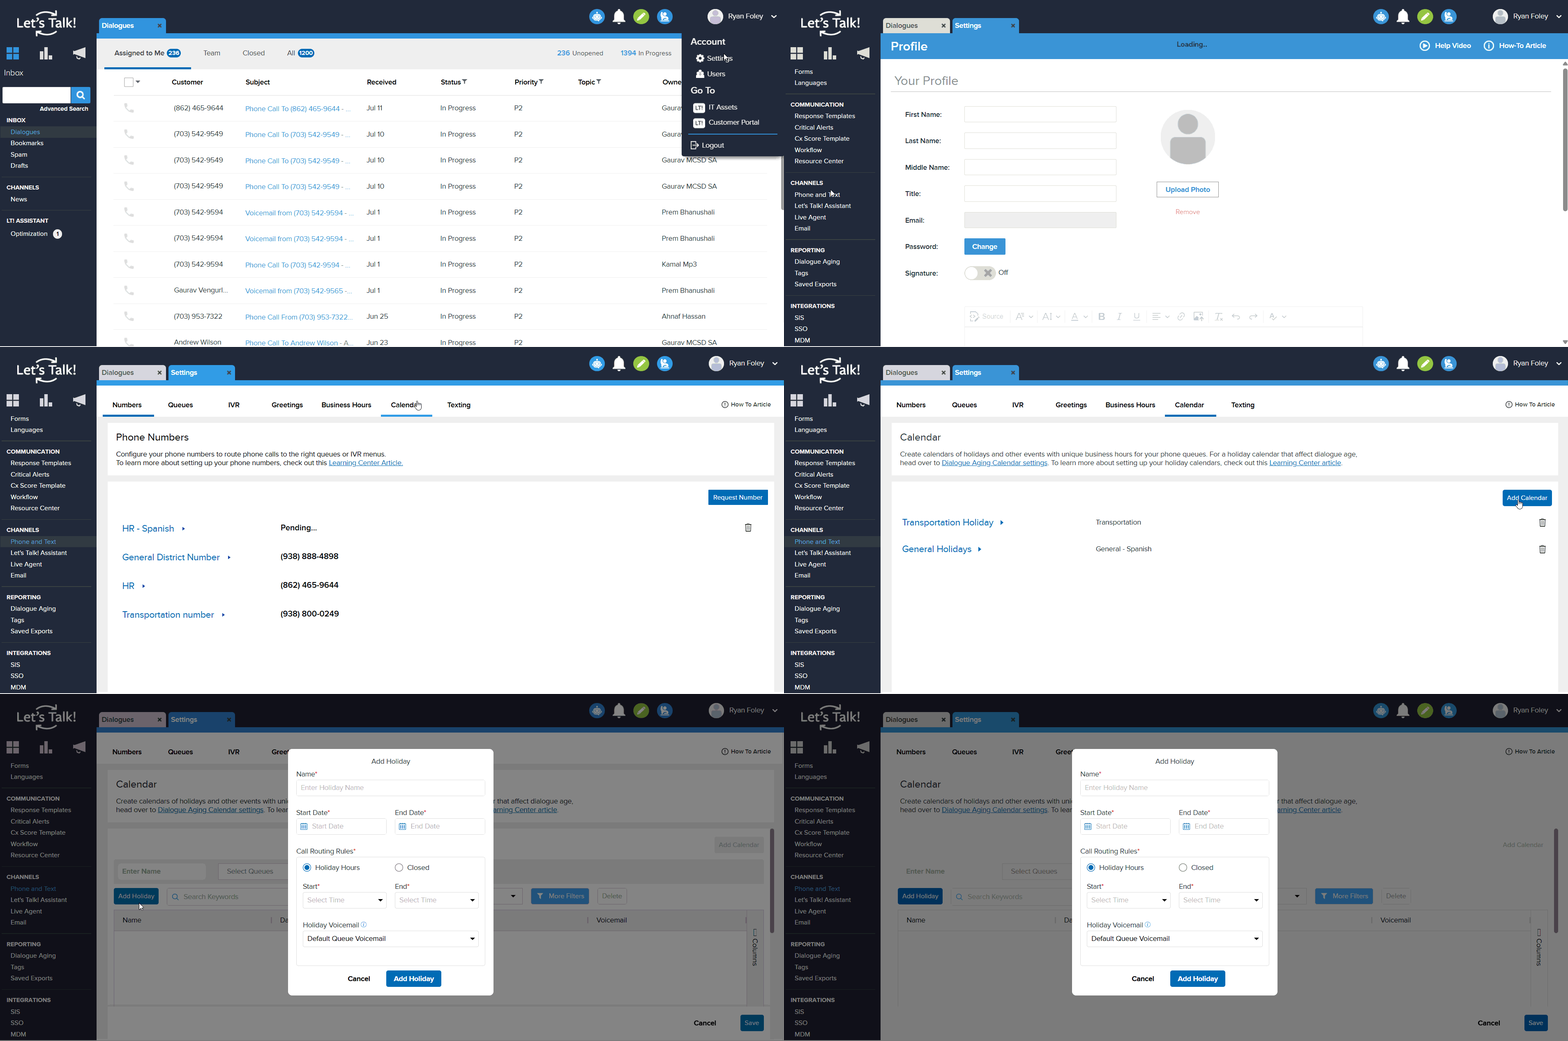
Create, update, and delete individual holidays, or entirely calendars, as needed. You can use multiple filters to easily manage as many holidays as you need. You can create holidays up to three years ahead of time, and keep track of old holidays up to one year back.
Note: These holiday calendars only control call center routing. For handling how dialogues age, refer to the calendar within the dialogue age settings.
Advanced Queue Settings
A handful of queue settings are only available for customers using Call Center. These relate to improving the customer experience while they are waiting in queues.
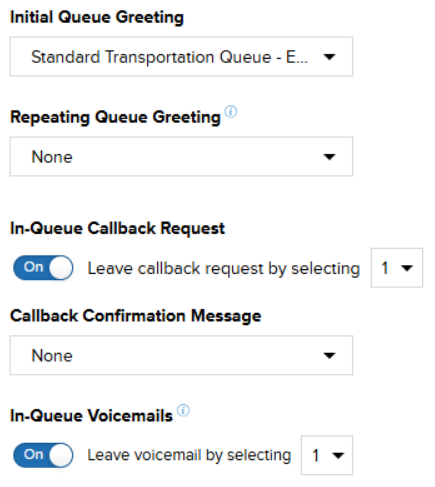
Repeating Queue Greeting
The repeating queue greeting plays every 60 seconds after the initial queue greeting, with hold music playing in between. This can be used to improve the caller's experience by just thanking them for their patience, or suggesting they try other options to reach out if needed.
In Queue Callback
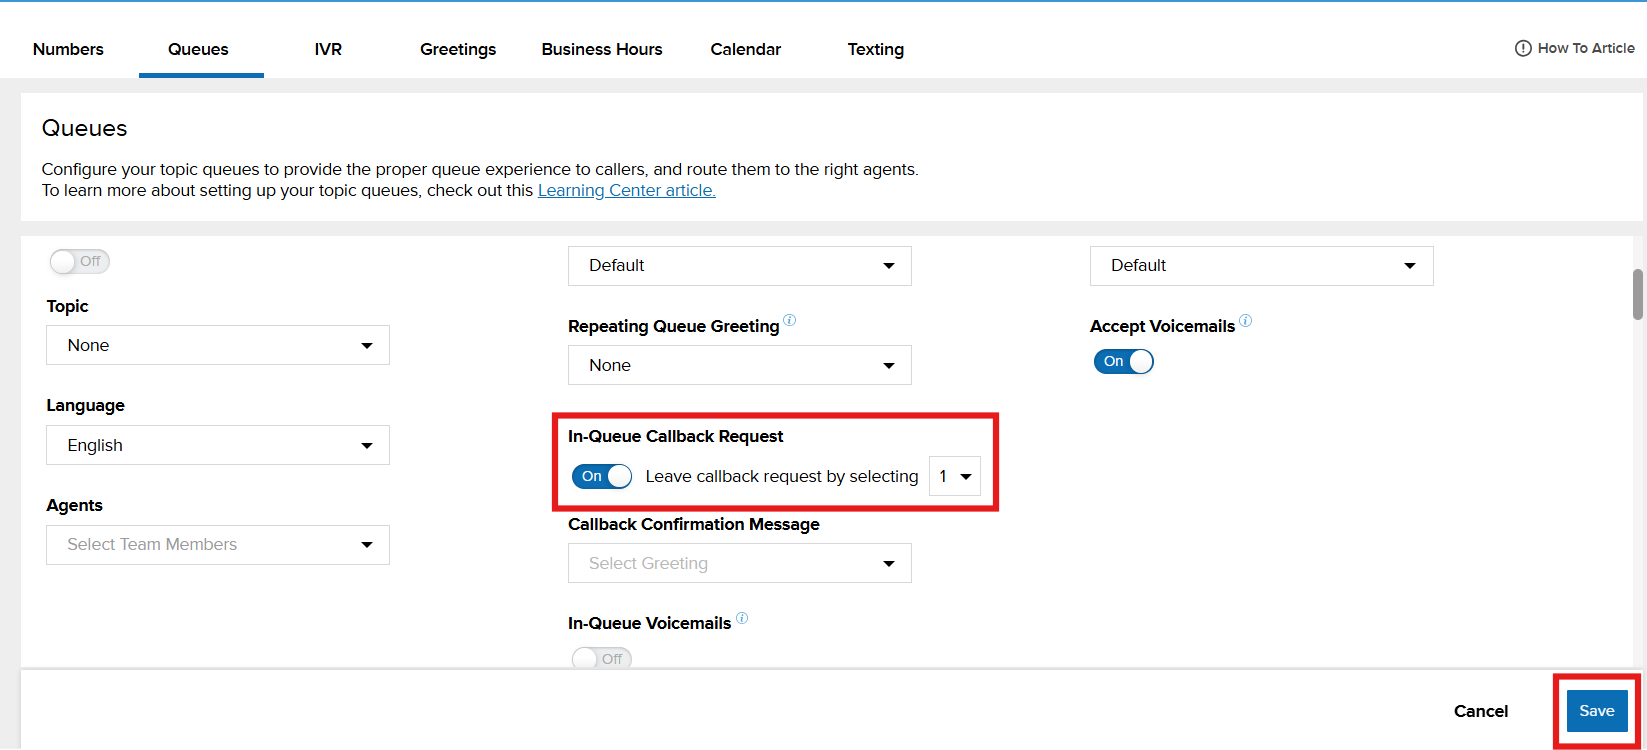
Giving callers the option to request a callback, rather than wait on hold, can help reduce wait times and improve the overall caller experience. Once a callback is requested, the caller retains their place in the queue, and the system automatically connects them with an available agent when it's their turn.
System Admins can enable this feature on a per-queue basis, allowing for flexible implementation based on team capacity and call volume. Detailed reporting is included, providing visibility into callback requests, completions, and response times—supporting better operational decisions and customer service insights.
To Enable Feature
- Click the In-Queue Callback Request toggle to 'On'
- Select a number that the customer will need to click on the dial pad for a call back request in the drop down menu
- Click Save
In-Queue Voicemails
Providing many of the same benefits as callbacks, you can also allow callers to leave a voicemail message instead. While callbacks stay within the call queues so agents will address them as soon as they’re available, voicemails leave dialogues that can be addressed more flexibly.
Advanced Routing and Greetings
When enabling In-Queue Callbacks or Voicemails, you’ll need to make sure callers are aware these options are available. Remember to update your greeting messages to include a callout that these options are available (EX: “At any time press 1 to request a callback or press 2 to leave a voicemail.”) You can choose to have this callout in the initial queue greeting or repeating queue greeting, but best practice is to include it in both. Additionally, if you want to turn these options off at any time, remember to update the greeting to not include that callout.

