Onflo (formerly Let's Talk!) can make contacting a client easier through its user-friendly interface. This article will demonstrate how to make outbound calls and identify Let’s Talk offers including how to make outbound calls from tickets, generate a ticket for a phone call, and additional features for System Administrators regarding Outbound calls
Making an Outbound Call
Onflo offers two methods for making outbound calls in Onflo; from an existing ticket, or making a new phone call and generating a ticket.
Method 1: Call From an Existing Ticket
This method is particularly useful if you have a customer who already has an existing ticket. This ensures that communications surrounding the topic remain organized in one area, and avoids the generation of multiple tickets for the same issue.
Note: A Topic does need to be assigned to this ticket before you can call the customer directly.
To Make a Call:
- Navigate to the side panel of your Onflo ticket in the customer information section
- Identify the green phone icon next to the phone number, then click the icon

3. A side panel will populate on the right side of your screen with the phone call handling tools to manage the call

Method 2: New Call Within Onflo
This method of generating an outbound call can be especially useful when a ticket has not yet been created in Onflo
- Navigate to the Green Pencil icon in the upper right corner of your Onflo Inbox

2. Click Make a Call
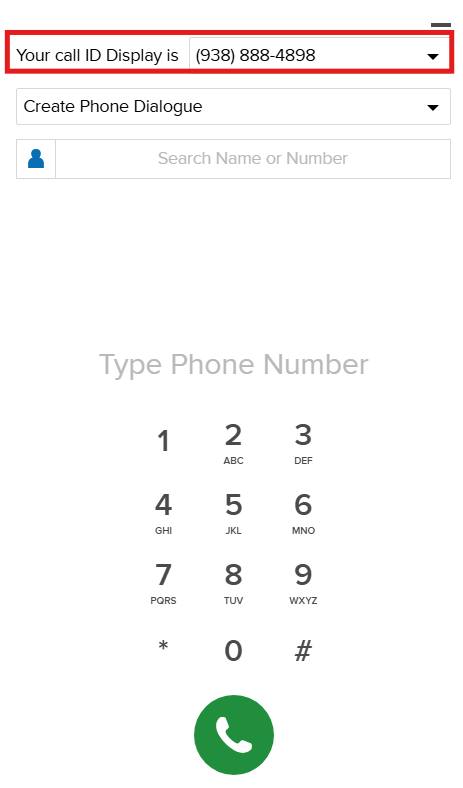
3. The dial pad will populate on your screen. From here you can choose which number (if you have multiple options) will appear on the recipients caller ID, then begin to type in the number on the dial pad, or search for the number

Note: When you make a new phone call this will also generate a new ticket in Onflo
Caller ID Display Number
Agents have the capability to choose which phone number will display on the customer's Caller ID when they make an Outbound Call. To select which outbound number you would like displayed click on the drop-down menu Your Call ID Display is, then select the number from the list of available options
Search Contact Book
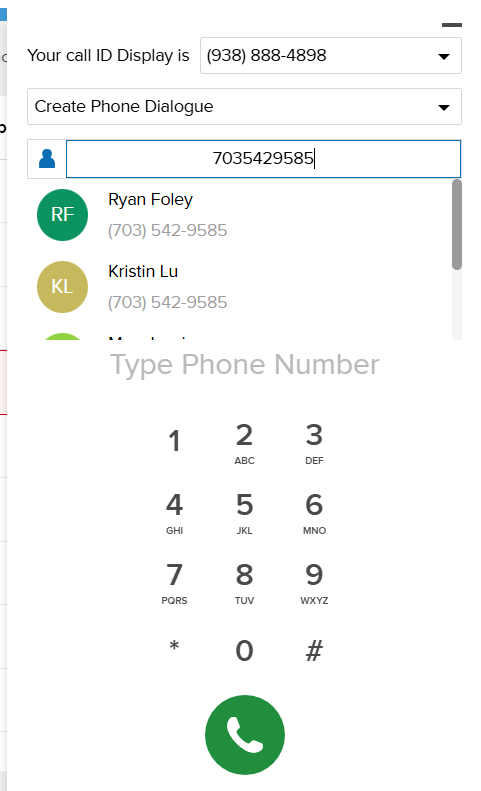
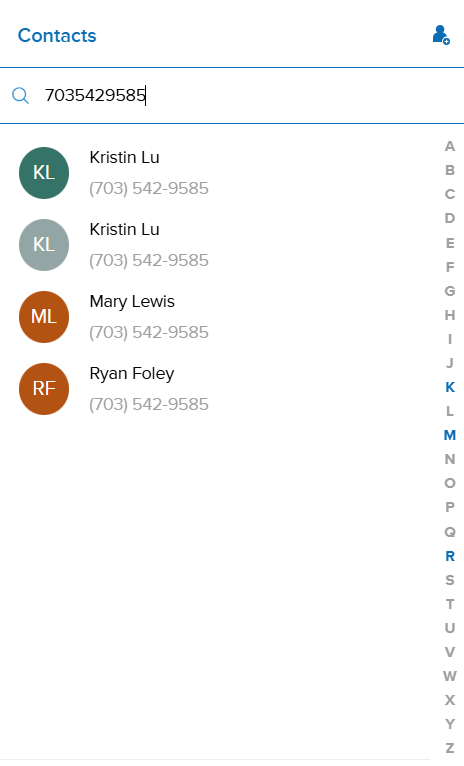
Once you have chosen to make a call you can locate contacts within the Contact Book feature within the call panel. To access the contact book you can type the name or number of the contact in the field within the call panel, or click the icon to search contacts (both saved contacts and prior received calls)
Documenting a Call
When making an Outbound Call you have the following actions available within the ticket:
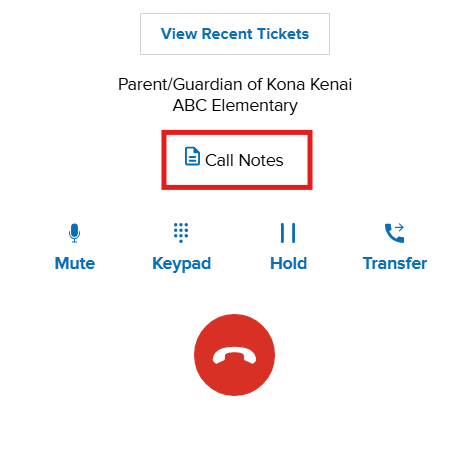
Call Notes
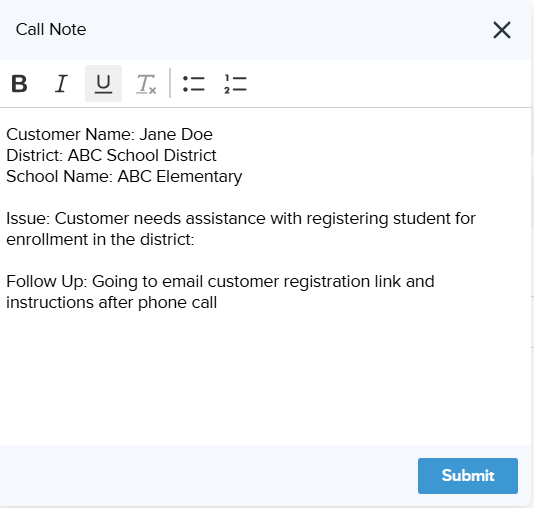
Agents can add notes during a call without opening the ticket page. Notes are automatically added as internal comments in the ticket. To access this feature click on the Call Notes button within the call, then fill in the notes in the Call Note field

Call Note Templates
System administrators also have the capability to create Call Note Templates. To create a template, follow the steps below:
- Access Settings, click Phone & Text, then click the Call Note tab
- Label the template with a name
- Generate your template in the Note field
- Select the queue(s) you would like the template assigned to as a default template for Call Notes (optional)
- Select the queue(s) you would like to make the template available to as an option for users (optional)
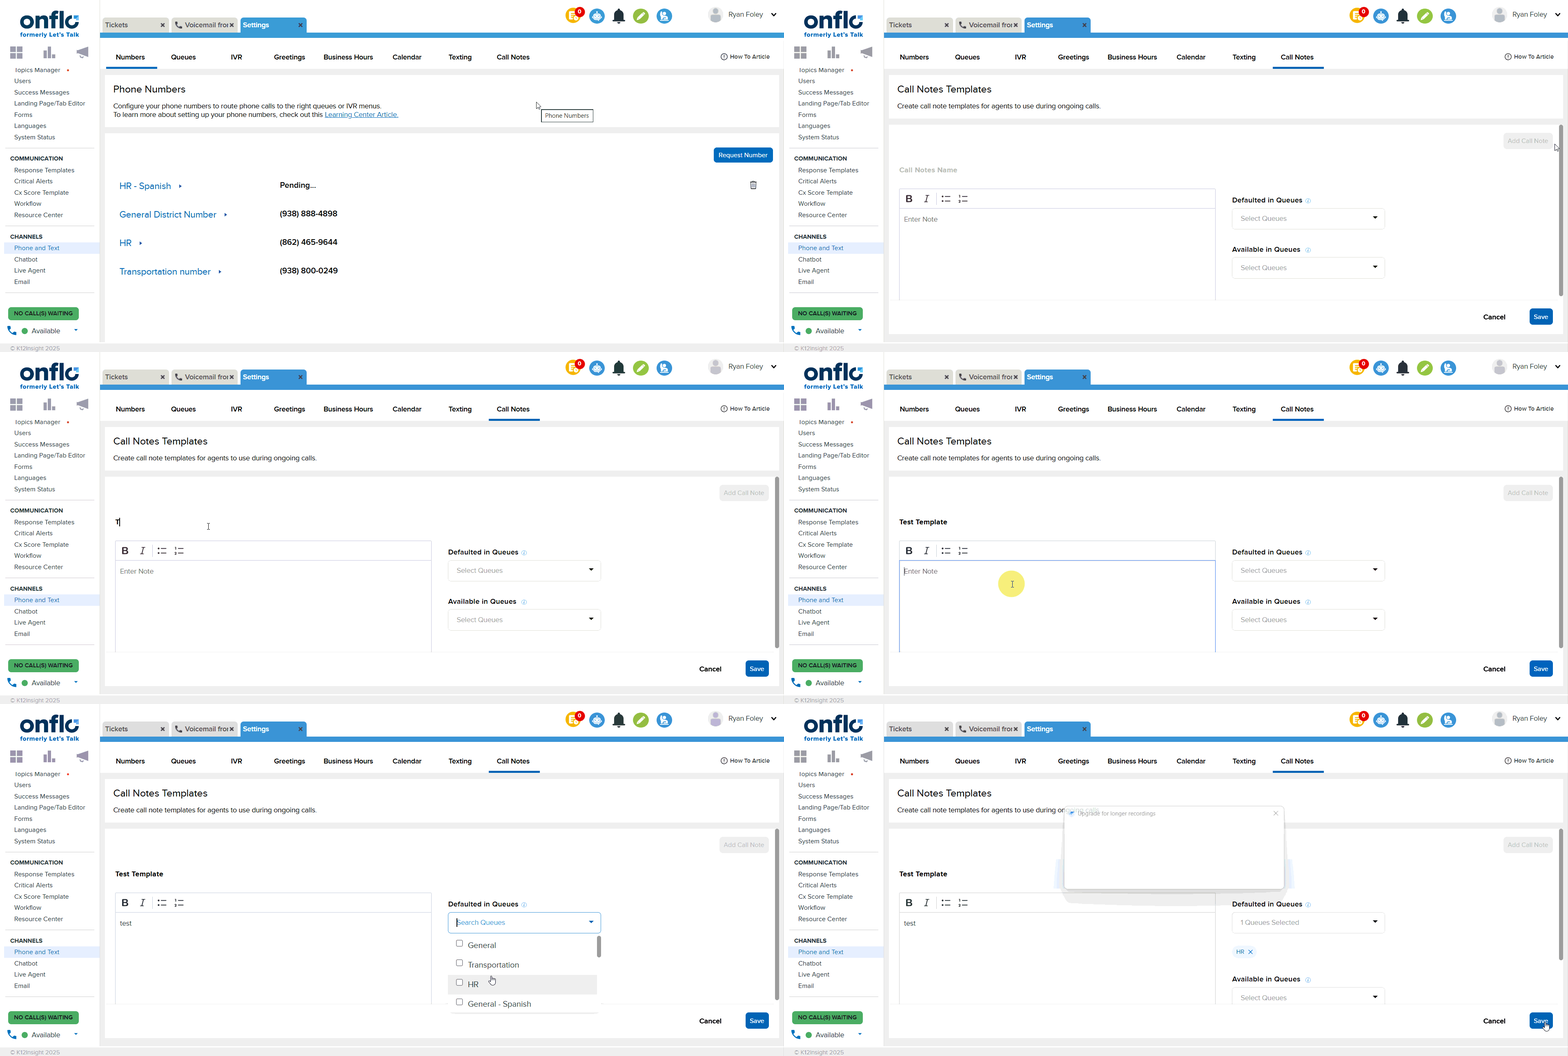
If you need to edit the template you can click on the title to access the template, and make any changes necessary. Additionally, you can delete a call note template you can click the small trash can icon on to the line of the template.

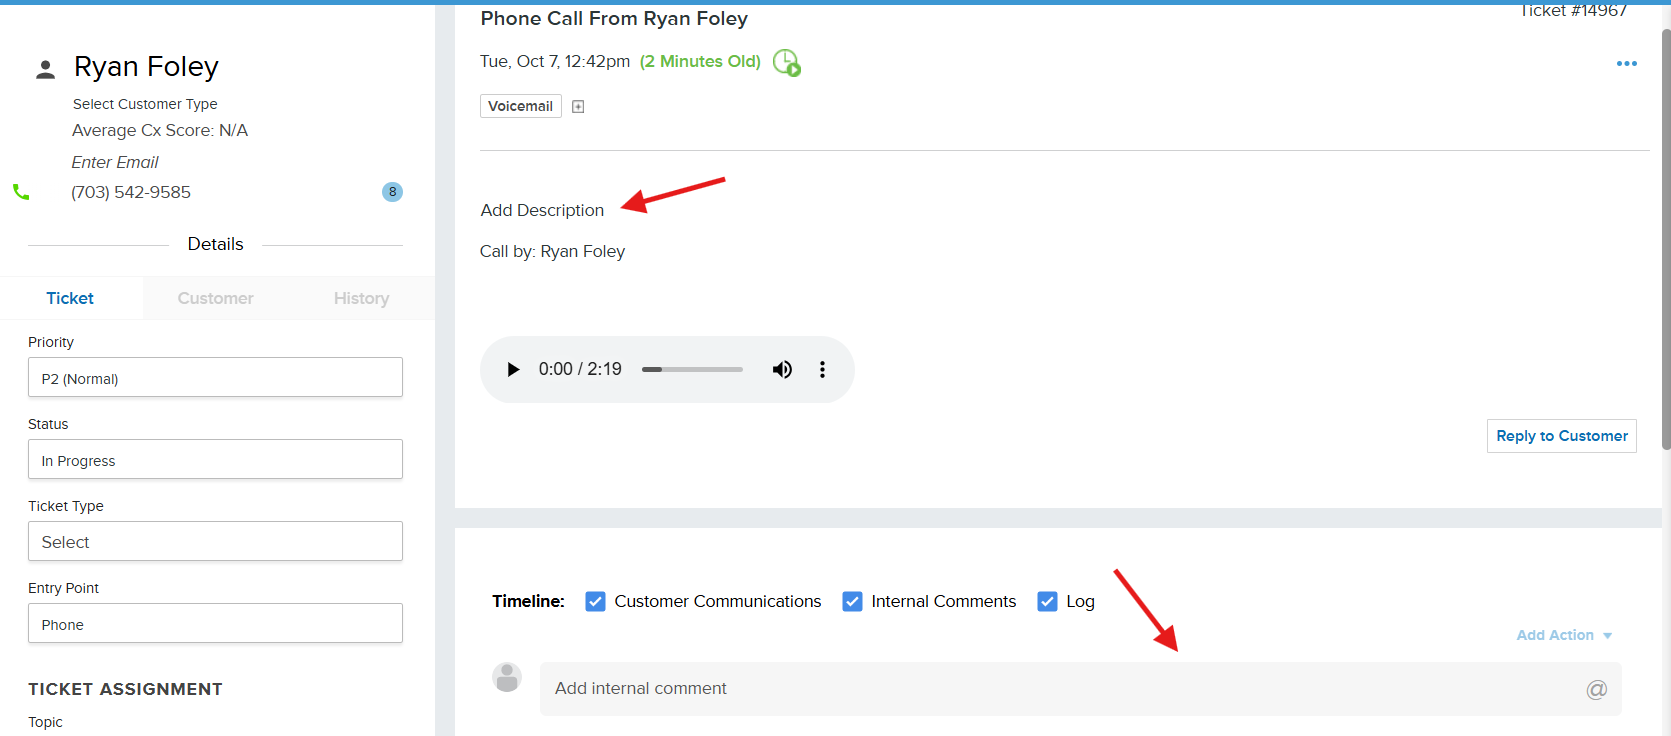
Add a Description
Record notes within a ticket to document the interaction.
Add Internal Comments
This field provides an area to take notes and tag internal staff members who you may need to have a view of the ticket.
Landline vs. Mobile
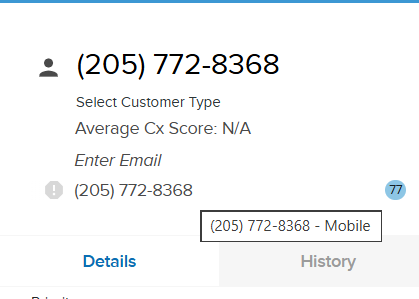
Our customer tickets can identify whether a customer is calling from a landline or mobile phone. Knowing what type of phone can allow your organization to better determine whether the customer can be replied to via text message saving time and providing a more efficient workflow. To determine whether a phone call originated from a landline or a mobile phone you can hover your cursor over the phone number in the ticket. This will provide an indication of the origin type for the phone call.
Limiting Outbound Number Access (System Admins Only)
Available for Outgoing Calls
System Administrators have the capability to select which phone numbers are available to which queues and corresponding staff. For example, if you want Transportation staff members to only have access to the Transportation phone line, then you can limit the number to only be available for the Transportation queue agents.
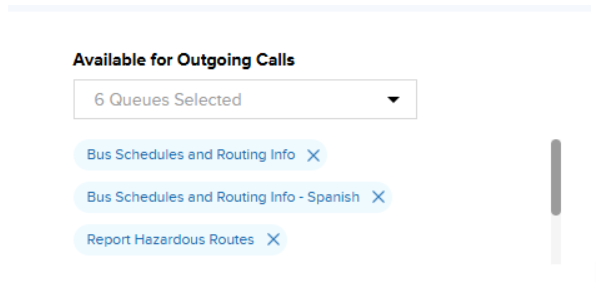
How to Limit Outbound Number Access
- Navigate to your Numbers settings tab under Settings > Channels > Phone and Text.
- Select the phone number you want to manage.
- Click on the Available for Outgoing Calls drop down menu.
- Select which queue(s) you would like to have access to this number (ex. Transportation).
- Once you have made your selection of queue(s) you wish to have access to this number, click Save.
Now this number will have only the corresponding topics you assigned and this number(s) will be available to staff in the drop down menu of their dial pad for numbers to make outgoing calls from.
Improving Pickup Rates - Outbound Calls
Are you concerned about whether your outgoing calls will be picked up? In a world of robocalls, spam and scams, everyone has gotten quite cautious in picking up the phone. Phone Carriers and device providers have been trying to combat this, and have gotten quite aggressive in labeling calls as spam. While this is great for the consumer, it’s become harder for legitimate callers such as school districts to reach out to their callers.
Ensuring that outgoing calls are displayed properly to users is a complex issue, as there is no guaranteed method to make sure your district name appears properly to users. However, there are a number of tools we use to drastically improve the chances your calls will be picked up.
Caller ID Name (CNAM)
When a phone carrier receives a call, before passing that call on to the recipient, they want to show who the call is coming from. They do this by finding out the Caller ID. There are two parts of “Caller ID”:
- The Number - traditionally called the “Caller ID”
- The Name - traditionally called the “Caller ID Name” or CNAM
If a receiving carrier does not have a CNAM, they simply display the phone number.
Making sure the receiving carrier has the CNAM is not exact, as each carrier has its own process for finding it. We have gone through the steps to register all of our phone numbers with the CNAM corresponding to the district the number belongs to. There are a few limitations to these CNAMs to be aware of:
- The CNAM needs to relate to the business the number is registered for. In our case it needs to correspond to the district name.
- The CNAM cannot be longer than 15 characters. This means in many cases we need to abbreviate the name in some way.
- The CNAM is managed per account. This means that each phone number in an account has the same CNAM.
Most importantly, we cannot guarantee that the CNAM is always shown. If you are not seeing a CNAM, here are a few reasons why that might be happening:
- The receiving carrier may not update the CNAM properly.
- Call recipients need to update their phone settings to receive CNAMs.
- The receiving carrier for some reason has decided to mark the call as “spam”.
Specifically for this last case, we have two more tools we use to deter calls from being marked as spam.
SHAKEN/STIR and Voice Integrity
Every phone carrier, and even some device providers, have their own processes to determine whether or not to mark a call as spam. This is an ever-evolving battle as bad actors continue to find loopholes, and carriers continue to improve security. This means there is no guaranteed method to make sure that calls are never marked as spam. However, there are a few tools we can use to drastically reduce the likelihood of that occurring.
SHAKEN/STIR is a technology that targets caller ID spoofing by adding an authentication layer to the telephony network. SHAKEN/STIR comes out of two acronyms:
- Secure Handling of Asserted information using toKENs (SHAKEN)
- Secure Telephony Identity Revisited (STIR)
Without getting into the technical details of how it works, this program essentially provides a grade for incoming calls that indicates how likely it is coming from the business it claims it is. By registering our phone numbers properly we are ensuring our calls are receiving an A grade. Carriers receiving phone calls will take this into account when decided when to mark calls as spam. On some smartphones recipients will even see “Caller Verified” on incoming calls.
Voice Integrity is a program specific to our service provider, Twilio, that registers phone numbers with different phone carriers. Carriers often have their own mix of analytics engines and number reputation checks to see if the call is legitimate. By using this program, we can be more confident that these carriers will know that our calls are not spam.