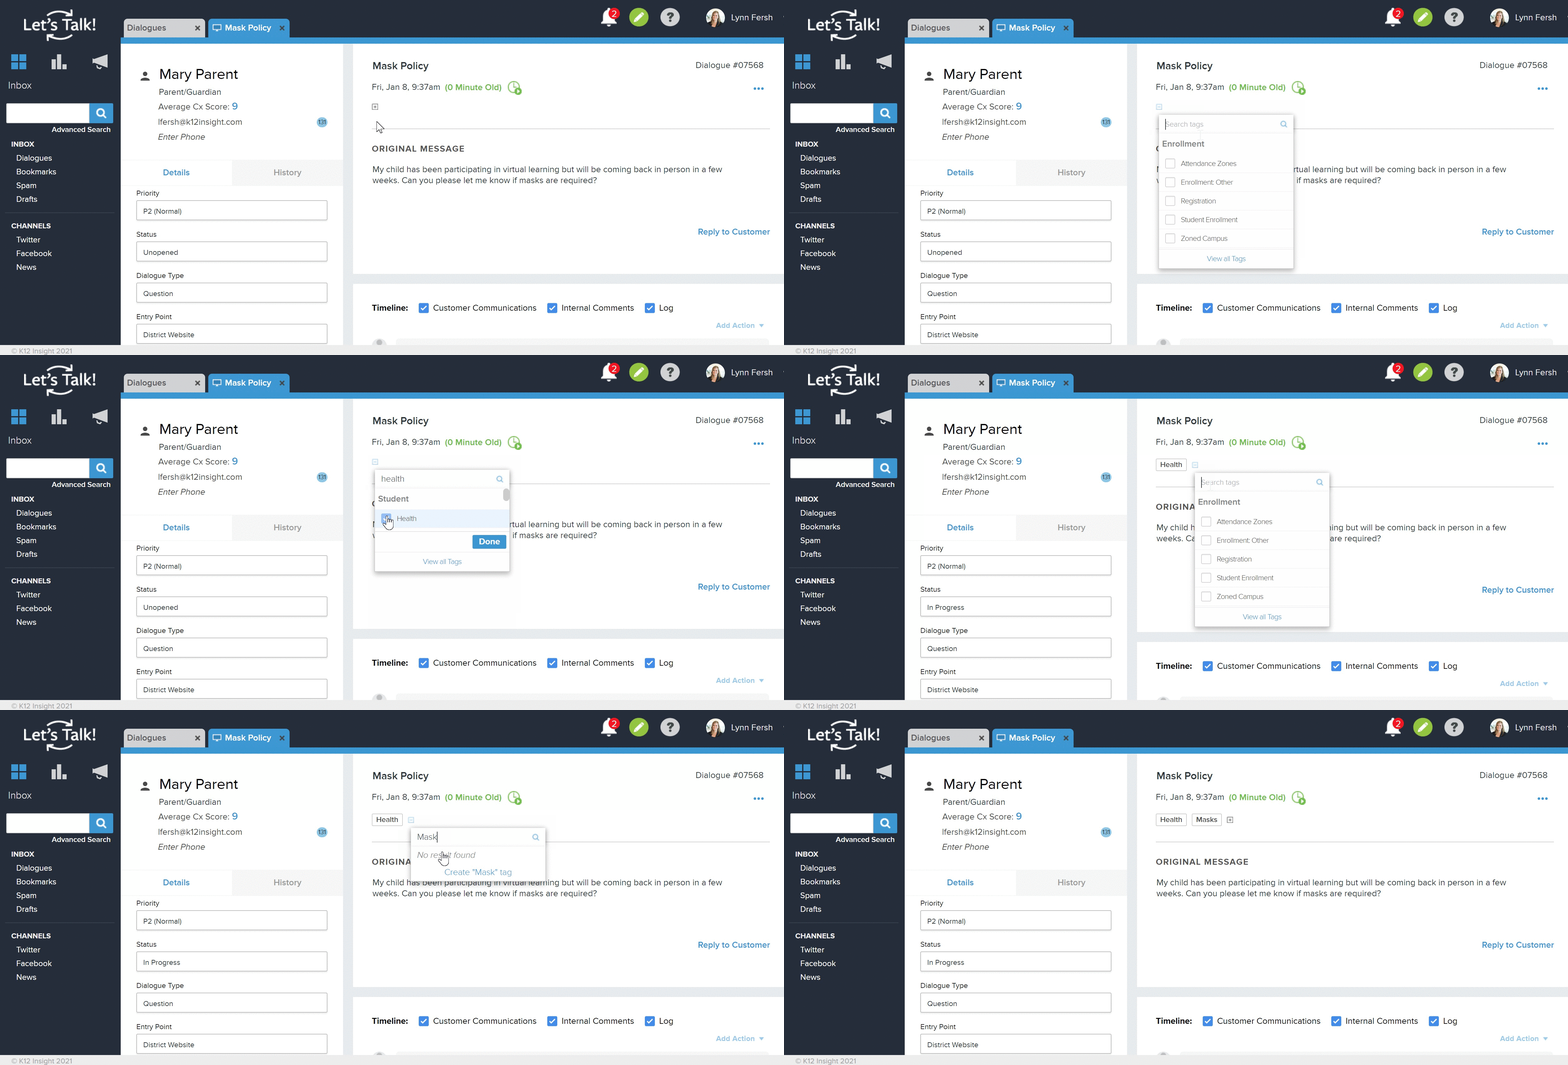
Similar to labels in email platforms, Let’s Talk! gives users the ability to add Tags to their Dialogues. Tagging Dialogues will help you to categorize messages and identify trends across Topics, Customer groups, and time periods.
How do I add Tags to Dialogues?
- From your inbox, click the Dialogue that you wish to add Tags to.
- Within the Dialogue open, click the Tags icon (tiny plus icon) located directly below the timestamp.
- Scroll/Search through the Tags drop-down menu to choose from a list of existing tags, or type in the box to create a new tag.
- Remove Dialogue Tags by hovering over it and clicking the “X”.

How can I use Tags?
- To search: Using Advanced Search, you can look for all dialogues containing certain Tags.
- To view trends: Check out the Tags section in the bottom right of the Overview Dashboard to see what tags are used most frequently.
- To trigger additional actions: Use Tags to trigger additional actions via Workflow in Let’s Talk!
- To label multiple related dialogues: Use Bulk Editor to apply the same Tag(s) to several dialogues at the same time.
To manage all Tags, go to Settings then click on Tags located under the Reporting section in the left panel. Here, you can view, add, delete, and enable or disable existing Tags.
